Word User guide
Welcome! This guide will explain how to set up your Word document, so that it can serve as a template for exporting.
In short, this is what you can do
- Create a new Word file
- Add styling and markup to your Word file, including a header, footer, page numbers and more
- Inside your content, you can make use of Tags, like showing the
${invoice_number}or${invoice_lines} - Create a
Word templatein this system, and upload your Word file - You can then export your
Word template(for example for an Invoice) to Word or PDF, where all the Tags will be replaced - Then optionally you can send this export to the customer
Getting started
This module expects that you will upload .docx files, as they provide the most (consistent) features.
Definitions
In this guide there will be mentions of tags, there are 3 types of tags that you can use in your Word document:
- Common tags that will be replaced by a predefined value (text, images, HTML etc.). For example:
${ticket_number}

${ticket_signature}

${PAGE_BREAK}
- Twig (advanced) tags, where you could apply additional formatting or do if statements, loops etc. For example:
{{ticket_date|date("m/d/Y")}}

{% if address_country_code == 'NL' %}Nederland{% endif %}

{% for tag in tags %}
-	{{ tag }}{% endfor %}
When using twig inside Word directly, it is recommended to not use tabs/spaces/enters if possible, because these will be visible in the final export, which could be unexpected.
- Block tags (uncommon), where you can define some content that might be cloned (repeated), deleted etc. For example:
${PAYMENT_CONDITION}
This should be deleted if payment condition is not relevant
${/PAYMENT_CONDITION}

${ADDRESS_DATA}
This will be cloned
Multiple times
${/ADDRESS_DATA}
Creating a word template
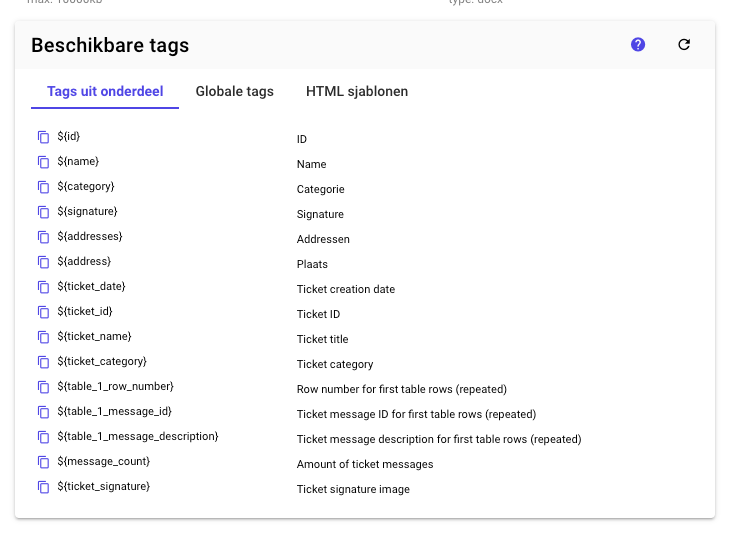
When you create a new Word template, you will need to select a Resource. The resource determines what tags will be available in your Word file. These tags are pre-defined by the developer.

Usage
Working with tables (repeated tags)
When you are making a template for Invoicing or something similar, you often have tables where you need to repeat lines in a table. In Word, you can create a table, apply styling, and then insert all tags that will be repeated:

If you need full customization, for example hiding / showing a column based on a condition, please (Create a custom tag)
Embedding fonts
You can embed your fonts in your Word file, but this is not recommended because:
- It will drastically increase your file size
- Converting the file will take more time, or might possibly even fail
Instead, please contact the developer to install a font if it's missing.
If you want to embed fonts anyway, please use the following setting:

Page numbering
Inserting page numbers in Word can be done in 2 ways
- Inserting a Page numer manually (setting alignment, formatting etc.)
- Inserting a pre-defined Header or Footer
Setting the alignment is currently not supported. Page numbers will be on the left side by default.
If you need to have the page number aligned in the center or at the right side, please double click on the page number
and increase the size, and put tabs/spaces as shown in the image:
In order to be sure that the page number is always consistent with the end-result, please install LibreOffice and view your document there.
Global tags
Page break
You can add the ${PAGE_BREAK} tag when you need the exported document to continue on the next page.
Address block
You can add the ${ADDRESS_BLOCK} tag when you want to show the full address of the customer
(for example when exporting an invoice or quotation).
It is very common in invoices to have invoice information on the left side, and address data on the right side.
For this reason, we recommend using a table (with an invisible border), so you can easily have content aligned next to eachother.
For example: 
Creating custom tags & Using twig
You can also create tags yourself, however:
- It will require basic HTML & CSS knowledge
- Using Twig is possible, so knowledge on Twig is also recommended (See documentation)
You can create a new tag by clicking on the button:

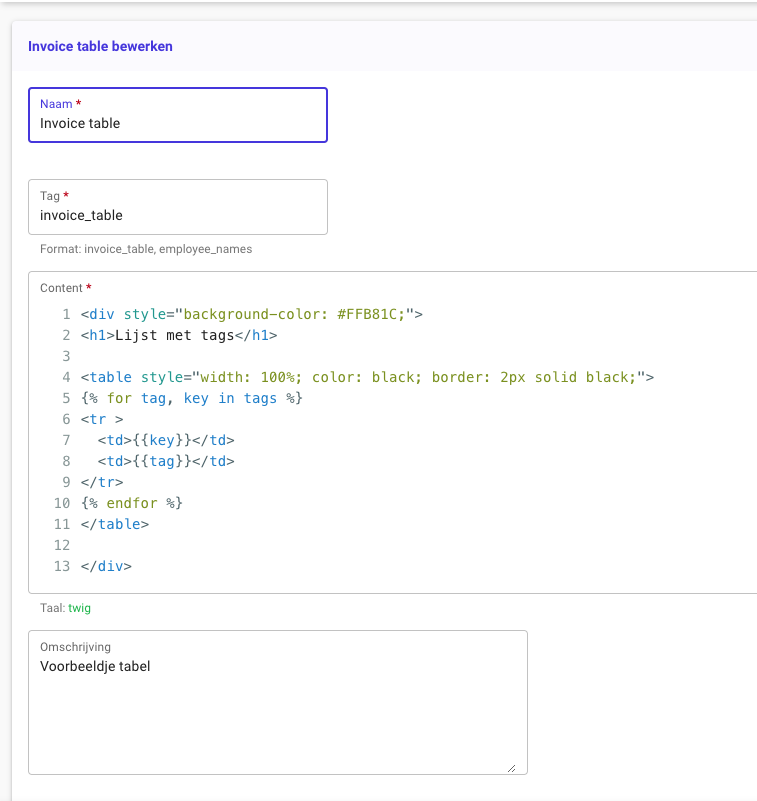
Here is an example of a custom tag:

Using the above example, you will be able to use ${invoice_table} in your Word document.
Exporting
Export and test the results
The final step is to test your Word file.
On the detail page of your Word template, there will be a preview available.
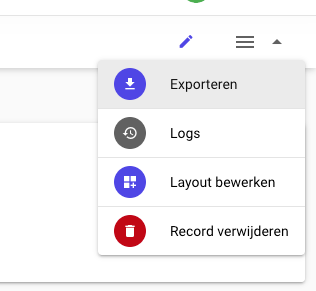
You can export a resource manually by going to actions:

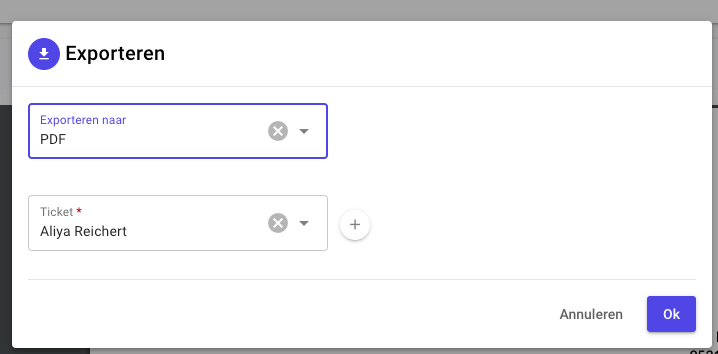
Then export to either Word or PDF:

Additional notes / troubleshooting
Export looks different as PDF
If the exported PDF looks different than your Word template, for example:
- Fonts are missing on the system (See Embedding fonts)
- Content is not visible near the edges
- There seems to be added white spaces or enters
If you're uncertain what the cause is for these issues, we recommend you install the software LibreOffice,
then open your Word document there, and see if there is any inconsistencies.
Be sure to also export your Word to PDF (both in Word and in LibreOffice) to see if maybe the issue is somewhere else.
Using custom tags will result into black boxes
If you see a black box, this may be caused by having HTML like this:
<div style="background-color: lightgrey;"></div>
You should consider using hex colors instead:
<div style="background-color: #FFB81C;"></div>
Not all tags are available
If you're expecting tags to be available, but they're not in the list for you, please contact the developer!