Timeline
With this module you can add a timeline to your resource, usually for its detail page.
Installation
composer require qore/timeline
After you installed the module publish its contents:
php artisan vendor:publish --tag=qore.timeline.db --force
php artisan vendor:publish --tag=qore.timeline.frontend --force
# Optional:
php artisan vendor:publish --tag=qore.timeline.config
After you have published the contents of the module run the migrations:
php artisan tenants:migrate
After you have installed the module you need to enable it in your Qore application.
Usage
This module needs some setup from your side, as it is built to be flexible.
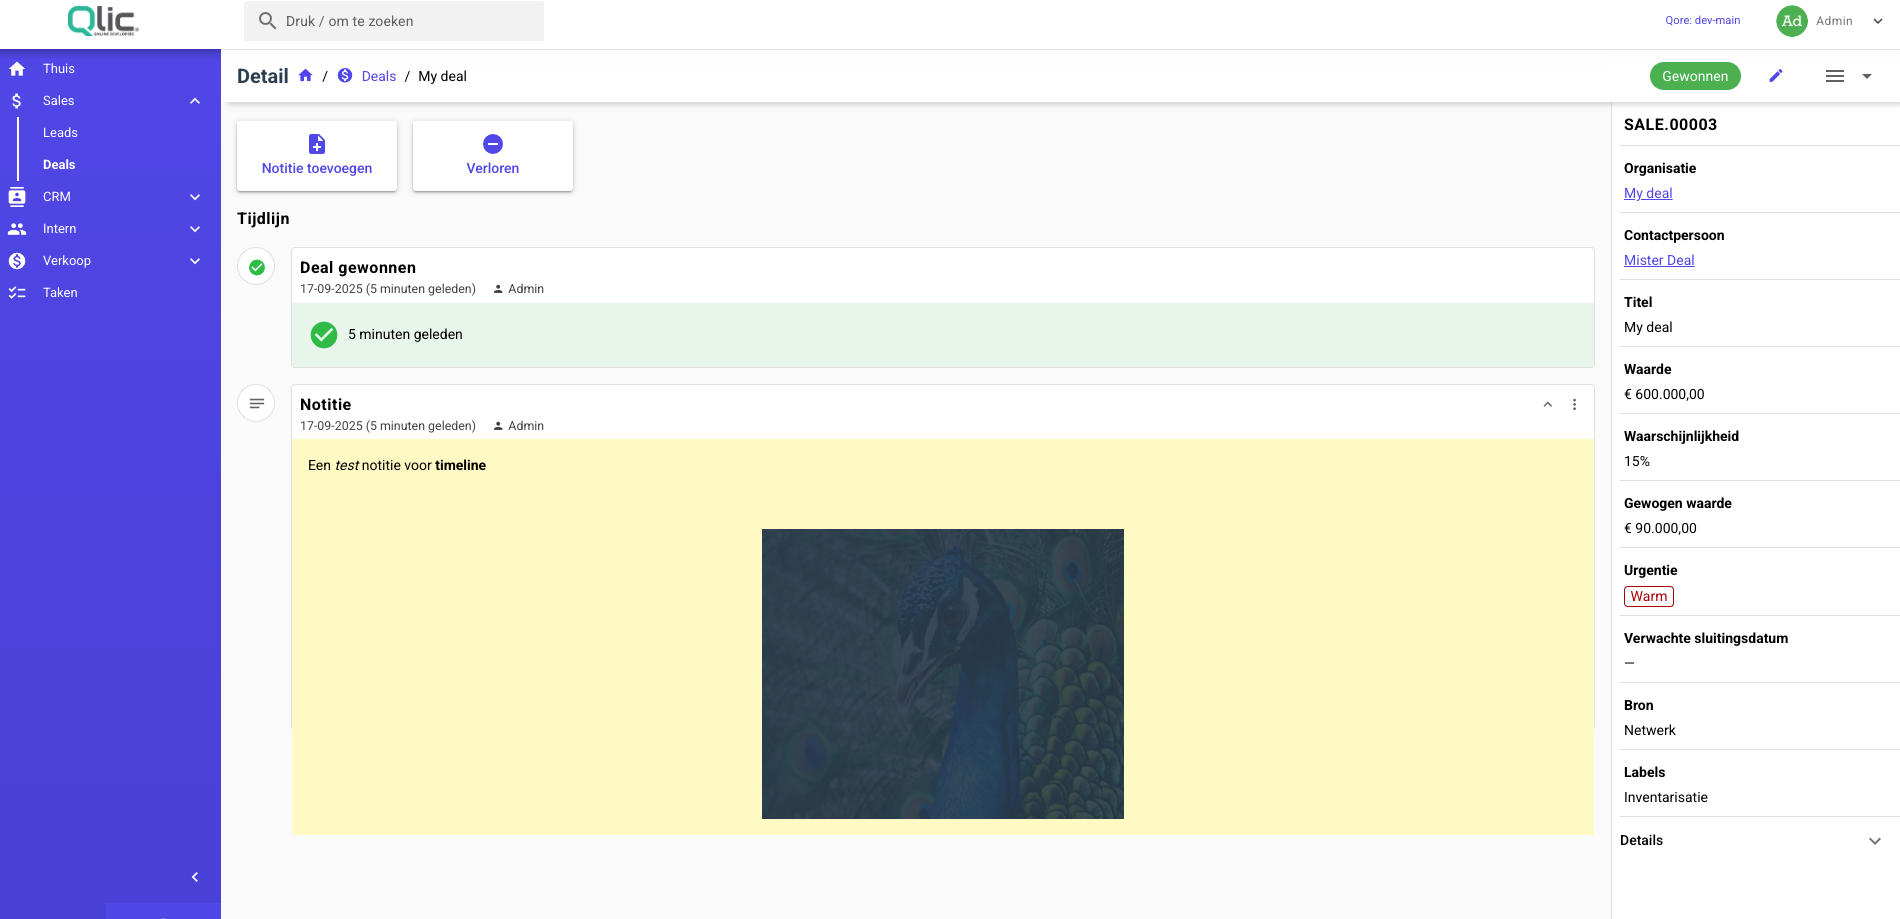
In the example below, we will add a timeline to the SalesDealResource.
Step 1: Implement interface
Add the following interface and trait to your resource:
class SalesDealResource extends QoreResource implements ResourceTimelineContract
{
    use HasResourceTimeline;
}
Then define the items that should be shown in the timeline:
/**
 * @return array<string, AbstractResourceTimelineItem>
 */
public function getResourceTimelineItemDefinitions(): array
{
    return [
        ResourceTimelineActionType::NOTE->value => new ResourceTimelineNoteItem,
        TimelineActionType::MARK_DEAL_AS_WON->value => new DealWonTimelineItem,
        TimelineActionType::MARK_DEAL_AS_LOST->value => new DealLostTimelineItem,
    ];
}
An item should extend the AbstractResourceTimelineItem class, e.g.:
class DealWonTimelineItem extends AbstractResourceTimelineItem
{
    public function component(): string
    {
        return 'DealWonTimelineItem';
    }

    public function jsonResourceClass(): string
    {
        return DealWonItemJsonResource::class;
    }

    public function iconColor(): string
    {
        return 'positive';
    }
}
As you can see, we also need to define a JSON resource for the item. This will be used to transform the data for the front-end component.
/**
 * @mixin ResourceTimelineItem
 */
class DealWonItemJsonResource extends JsonResource
{
    public function toArray(Request $request): array
    {
        $wonAt = Carbon::parse($this->payload['won_at']);

        return [
            'won_at' => date_time_presenter($wonAt, asDiffForHumans: true),
        ];
    }
}
Step 2: Add actions
Now you can add timeline actions to your resource that will create timeline items. These are normal QoreResource actions but tailored to fit more into the timeline.
public function getResourceTimelineActions(ResourceTimeline $timeline): ResourceTimelineActionCollection
{
    return ResourceTimelineActionCollection::make([
        new NoteResourceTimelineAction($timeline),
        new MarkDealAsWonAction($timeline),
        new MarkDealAsLostAction($timeline),
    ]);
}
To define the action:
class MarkDealAsWonAction extends ResourceTimelineAction
{
    public function __construct(ResourceTimeline $timeline)
    {
        parent::__construct($timeline);

        $this->canRun(fn (SalesDeal $deal) => $deal->status !== SalesDealStatus::WON);
    }

    public function title(): string
    {
        return ___('sales::sales.won');
    }

    public function icon(): string
    {
        return MaterialIcons::CHECKCIRCLE->value;
    }

    public function typeName(): string
    {
        return TimelineActionType::MARK_DEAL_AS_WON->value;
    }

    /**
     * @param  SalesDeal  $model
     * @param  array<string, mixed>  $arguments
     */
    public function run(Model $model, array $arguments): void
    {
        $wonAt = now()->setTimezone(config('app.timezone'));

        $model->won_at = $wonAt;
        $model->status = SalesDealStatus::WON;
        $model->save();

        $item = new_resource_timeline_item(
            timeline: $this->timeline,
            typeName: $this->typeName(),
            title: ___('sales::sales.won_deal'),
            icon: $this->icon(),
            payload: [
                'won_at' => $wonAt->format('Y-m-d H:i:s'),
            ]
        );

        $item->save();
    }
}
As you can see, the action also has a typeName. This is used to link the action to the timeline item definition.
In some cases, like a Note, you might want the user to be able to edit the contents of your item:
class NoteResourceTimelineAction extends ResourceTimelineAction
{
    // ...

    public function editable(): bool
    {
        return true;
    }

    public function editItemFields(ResourceTimelineItem $item): FieldCollection
    {
        return $this->myFields($item);
    }

    /**
     * @param  array<string, mixed>  $arguments
     */
    public function updateItem(ResourceTimelineItem $item, array $arguments): void
    {
        $item->title = $arguments['title'] ?? $this->title();
        $item->payload = [
            'note' => $arguments['note']
        ];
        $item->save();
    }
}
Step 3: Resource Front-end
First, override the component for the detail page:
public function resourceDetailComponent(): string
{
    return 'SalesDealDetail';
}
Create the vue component:
<template>
  <ResourceTimeline
    resource-name="sales_deals"
    :model-id="model.id"
    v-on="$listeners"
  />
</template>

<script>
export default {
  props: {
    model: {
      type: Object,
      required: true
    }
  }
}
</script>
And register it somewhere globally in your project:
Vue.component('SalesDealDetail', () => import('./Details/SalesDealDetail'))
Step 4: Items front-end
Finally, you need to create the front-end components for your timeline items.
Create a new Vue component:
<template>
  <ResourceTimelineItemWrapper
    :item="item"
    :expandable="false"
    :editable="false"
    :deletable="false"
    :pinnable="false"
    v-on="$listeners"
  >
    <div class="q-pa-md bg-green-1">
      <div class="flex gap-sm items-center">
        <q-icon
          name="check_circle"
          color="positive"
          size="md"
        />

        {{ item.won_at }}
      </div>
    </div>
  </ResourceTimelineItemWrapper>
</template>

<script>
export default {
  props: {
    item: {
      type: Object,
      required: true
    },
    resourceName: {
      type: String,
      required: true
    }
  }
}
</script>
You don't need to use the ResourceTimelineItemWrapper but it gives you some default styles and other features like expand/edit/delete/pin buttons.
Then register it globally:
Vue.component('DealWonTimelineItem', () => import('./TimelineItems/DealWonTimelineItem'))
Configurations
Overriding defaults
You can override the following methods to your resource if necessary:
public function getResourceTimeline(Model $model, string $name = 'default'): ResourceTimeline;

public function canViewResourceTimeline(ResourceTimeline $timeline): bool;

public function canAddItemsToResourceTimeline(ResourceTimeline $timeline): bool;

public function canEditItemsInResourceTimeline(ResourceTimelineItem $item): bool;

public function canRemoveItemsFromResourceTimeline(ResourceTimelineItem $item): bool;

public function getResourceTimelineActions(ResourceTimeline $timeline): ResourceTimelineActionCollection;

public function getTimelineTitle(ResourceTimeline $timeline): string;

/**
 * @return array<string, AbstractResourceTimelineItem>
 */
public function getResourceTimelineItemDefinitions(): array;
Expanding items
You can conditionally show more details for an item by making it expandable, e.g. for a Note item:
<template>
  <ResourceTimelineItemWrapper
    ref="wrapper"
    :item="item"
    :expanded="expanded"
    v-on="$listeners"
    @expanded="(val) => expanded = val"
  >
    <div
      class="bg-yellow-2 q-pa-md white"
      style="white-space: pre-line;"
    >
      <span v-if="!expanded">{{ truncatedNote }}</span>

      <CKEditorDetail
        v-if="expanded"
        :key="item.note"
        :field="item.note_field"
        :value="item.note"
      />
    </div>
  </ResourceTimelineItemWrapper>
</template>

<script>
export default {
  ...
  data () {
    return {
      expanded: false
    }
  },
  computed: {
    truncatedNote () {
      return this.$truncate(this.item.note_string, 200)
    }
  },
  mounted () {
    this.expanded = true
  }
}
</script>